Bringing a home theater to life can be an exciting prospect, transforming your living room into a cinematic escape. One of the most common hurdles, however, is correctly connecting your speakers to your AV receiver. While the tangle of wires and numerous ports might seem intimidating at first, understanding a few key principles will empower you to set up your system for fantastic sound without needing a technical degree. This guide focuses on simplifying the process of connecting passive (non-powered) speakers to your AV receiver, ensuring you get the most out of your audio equipment.
Understanding Your AV Receiver and Speaker Connections
Your AV receiver acts as the central hub of your home theater system. It takes in audio (and often video) signals from various sources like Blu-ray players, streaming devices, or game consoles, processes them, and then amplifies the audio to send to your speakers. Speakers, on the other hand, convert these amplified electrical signals back into sound waves you can hear. The connection between them is crucial.
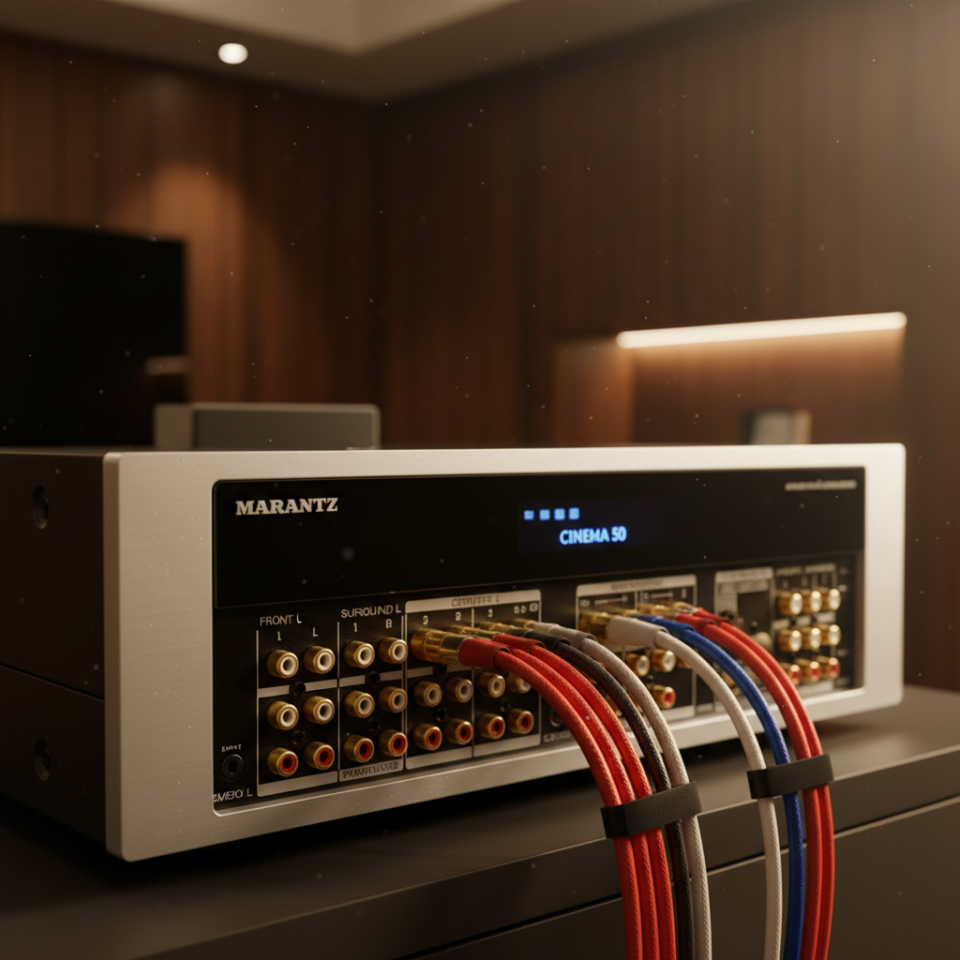
Most AV receivers feature a row of speaker terminals on the back. These are typically color-coded and labeled for each speaker in a standard surround sound setup: Front Left (FL), Front Right (FR), Center (C), Surround Left (SL), Surround Right (SR), and sometimes additional channels for more immersive experiences (like Surround Back, or Height speakers for Dolby Atmos). Each speaker connection will have two terminals: a red one for the positive (+) wire and a black one for the negative (-) wire. Your speakers will also have similar terminals.
The most straightforward way to connect is using bare speaker wire, which is essentially two insulated copper wires bundled together. You’ll strip a small amount of insulation from the ends of each wire to expose the copper. Many beginners find banana plugs or spade connectors helpful. These attach to the ends of your speaker wires, making a more secure and often easier connection to the receiver and speaker terminals.
The Importance of Polarity and Speaker Wire Gauge
When connecting your speakers, paying attention to “polarity” is crucial. This simply means ensuring that the positive (+) terminal on your receiver connects to the positive (+) terminal on your speaker, and the negative (-) terminal on your receiver connects to the negative (-) terminal on your speaker. Most speaker wires have some form of marking (a stripe, ribbed texture, or printed text) on one side to help you distinguish between the two conductors. Consistency is key: once you decide which side is positive (e.g., the ribbed side), stick with it for all your speaker connections. If you mix up the polarities, your speakers will be “out of phase,” resulting in thin, weak, and less impactful sound, especially in the bass frequencies.
Another important factor is speaker wire gauge, which refers to the thickness of the wire. It’s measured using the American Wire Gauge (AWG) system, where a lower number indicates a thicker wire (e.g., 14-gauge is thicker than 18-gauge). Thicker wire offers less resistance to the electrical signal, which is beneficial over longer distances or with more demanding speakers. For most home theater setups in typical living rooms, 16-gauge wire is a good all-around choice. If your speakers are far from the receiver (more than 25-30 feet) or you have very powerful speakers, consider bumping up to 14-gauge. Using too thin a wire can lead to a slight loss of audio quality and potentially even strain your receiver over time, though for most casual listening, the audible difference might be subtle.
Practical Connection Steps and Initial Setup
Before you begin connecting anything, ensure your AV receiver is unplugged from the wall outlet for safety. This prevents any accidental shorts or damage. Once unplugged, follow these steps:
- **Prepare Your Wires:** Measure the distance from your receiver to each speaker, adding a little extra slack. Strip about half an inch of insulation from each end of your speaker wires. Twist the exposed copper strands tightly to prevent stray wires. If using banana plugs or spade connectors, attach them now according to their instructions.
- **Connect to Speakers First:** It’s often easier to connect the wires to your speakers first. Match the positive (+) wire (e.g., marked side) to the red terminal and the negative (-) wire to the black terminal. If using bare wire, press the terminal lever (or unscrew the cap), insert the wire cleanly, and release the lever (or tighten the cap) to secure it.
- **Connect to Receiver:** Now, connect the other end of each speaker wire to the corresponding terminals on your AV receiver. Again, ensure positive goes to positive (red to red) and negative goes to negative (black to black). Double-check every connection to ensure they are secure and that no stray copper strands from one wire are touching the other, which could cause a short circuit.
- **Initial Receiver Power-Up:** Once all speakers are connected, plug your AV receiver back into the wall. Turn it on and access its setup menu. Most modern receivers have an automatic speaker calibration feature (often involving a small microphone that comes with the receiver). This process listens to test tones from each speaker and automatically sets the correct speaker size, distance, and volume levels for your room, significantly improving sound quality. Run this calibration for the best results.
By following these steps, you’ll have successfully connected your speakers, laying the foundation for an immersive audio experience.